Omega Flash Installation Instructions
Our how-to video shows you how to install the Omega Flash properly. You'll need standard roofing nails abnd urethane caulk to install. If you need more of a breakdown look below for our step by step instructions. Instructions are also available en español.
En Español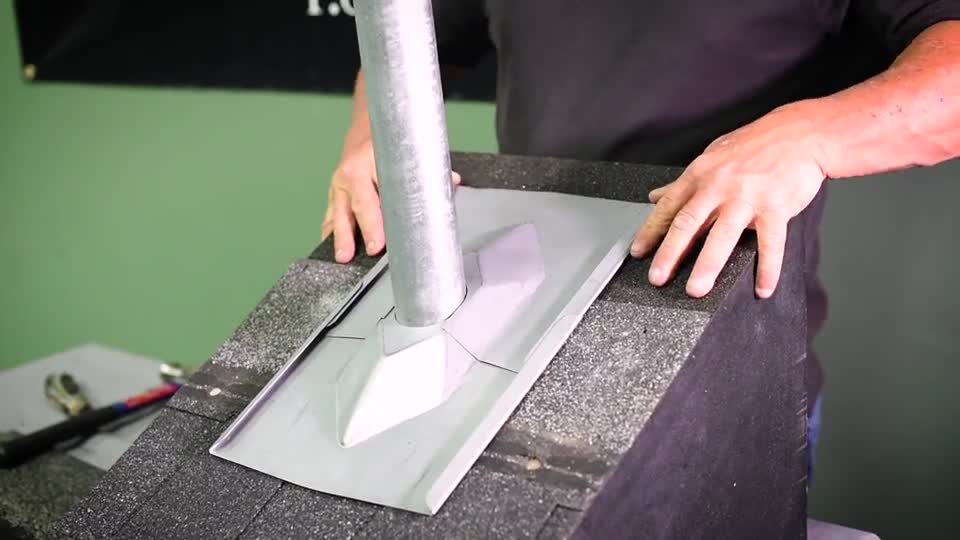
Step by Step Instructions
-
Install first shingle
Once old flashing and shingles removed, install the first shingle around the electrical mast.
-
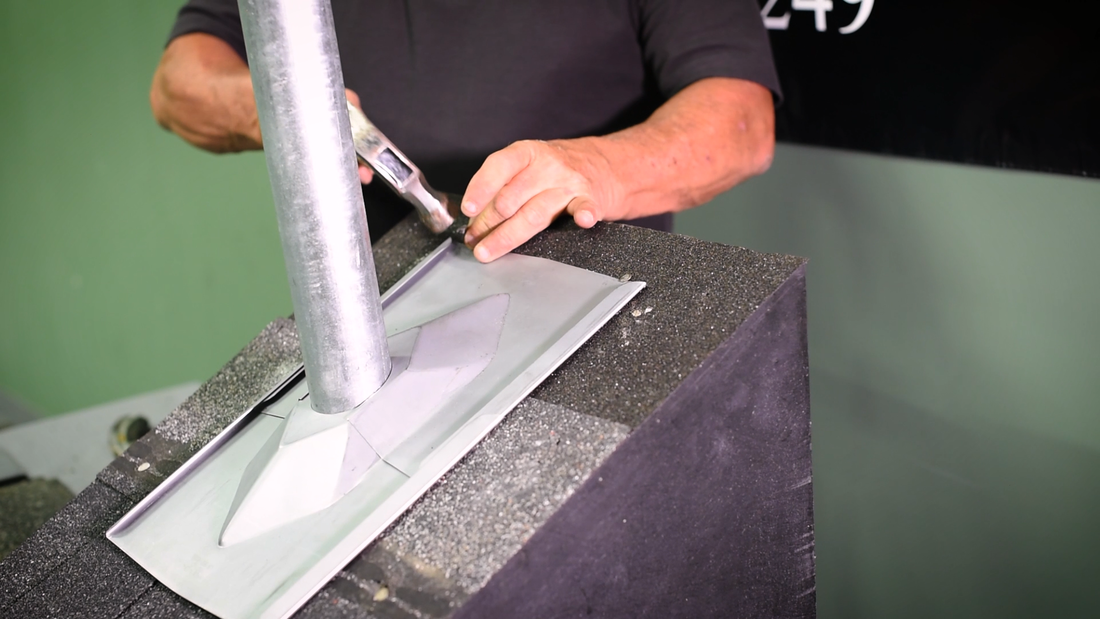
Install bottom piece of Omega Flash
Align round opening to electrical mast and place on top of first shingle. Attach on each side using 1½" roofing nails at the midpoint between water hem and raised water diverter, penetrating top edge of flashing.
-
Install top piece of Omega Flash
Slide top portion of flashing into bottom portion making a tight fit. Attach top portion of flashing with 1½" roofing nails at right and left corners being careful not to penetrate flashing, using only the head of the nail to secure in place.
-
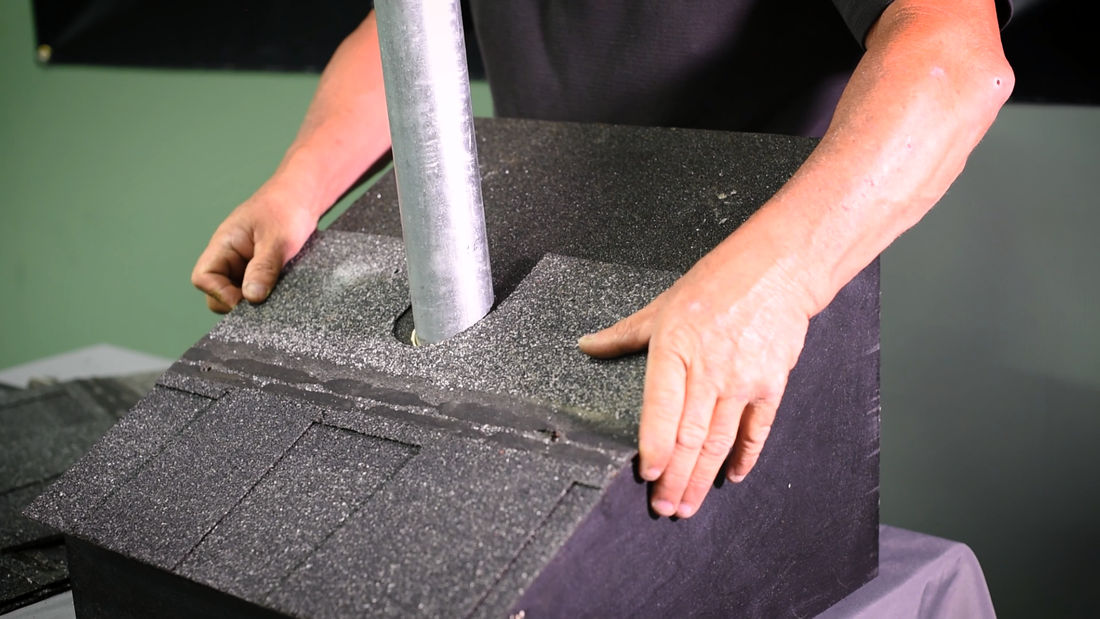
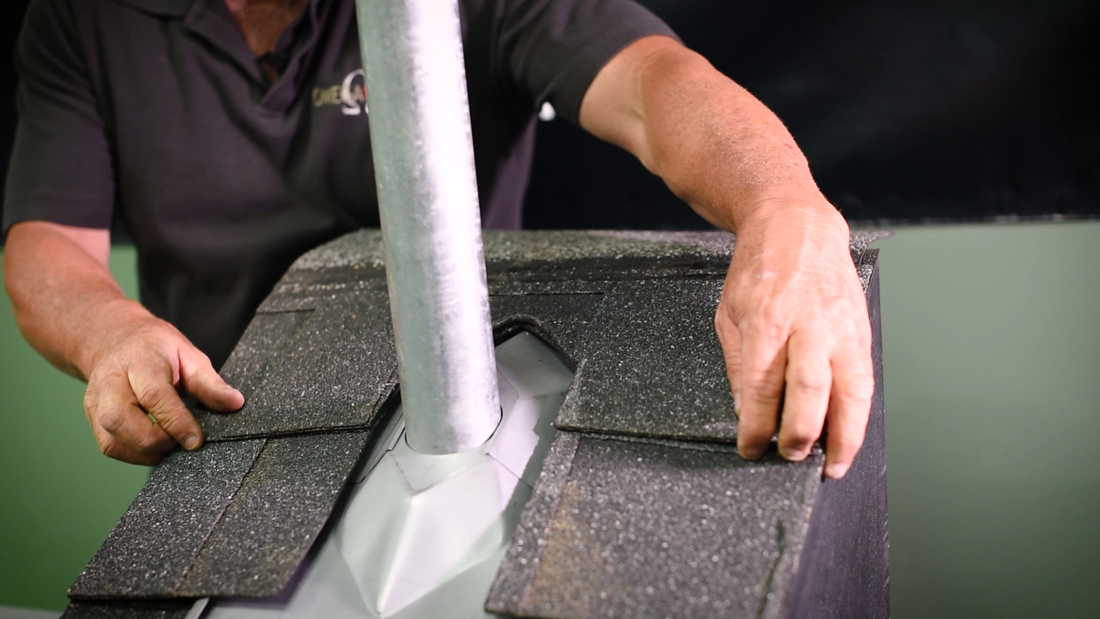
Install remaining shingles
Install remaining shingles as necessary to cover flashing, cutting shingles as shown, being careful not to penetrate the flashing.
-
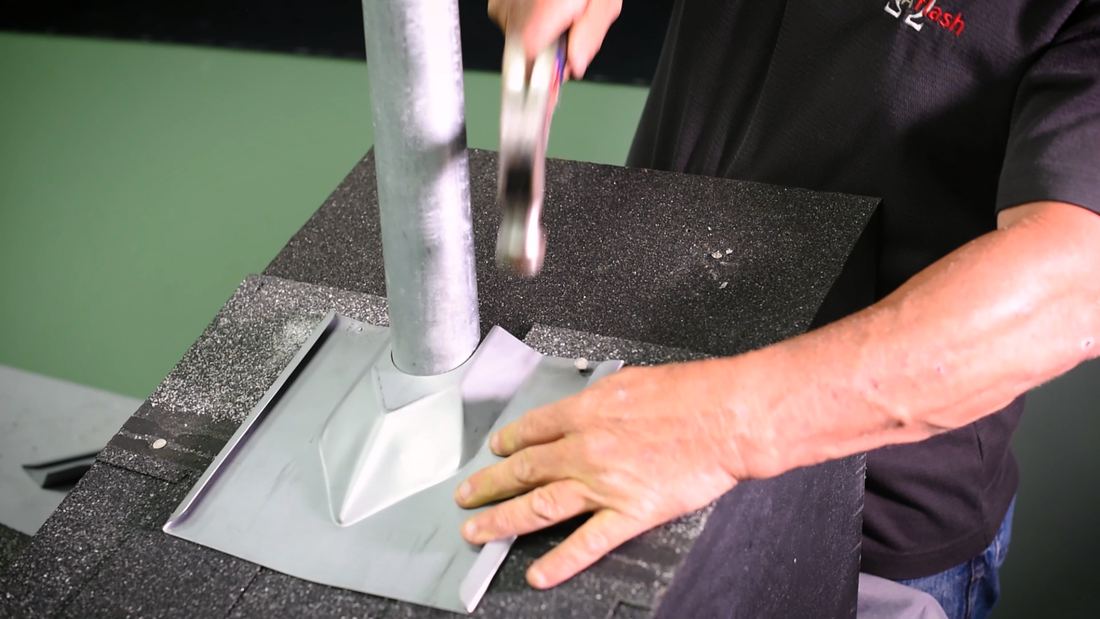
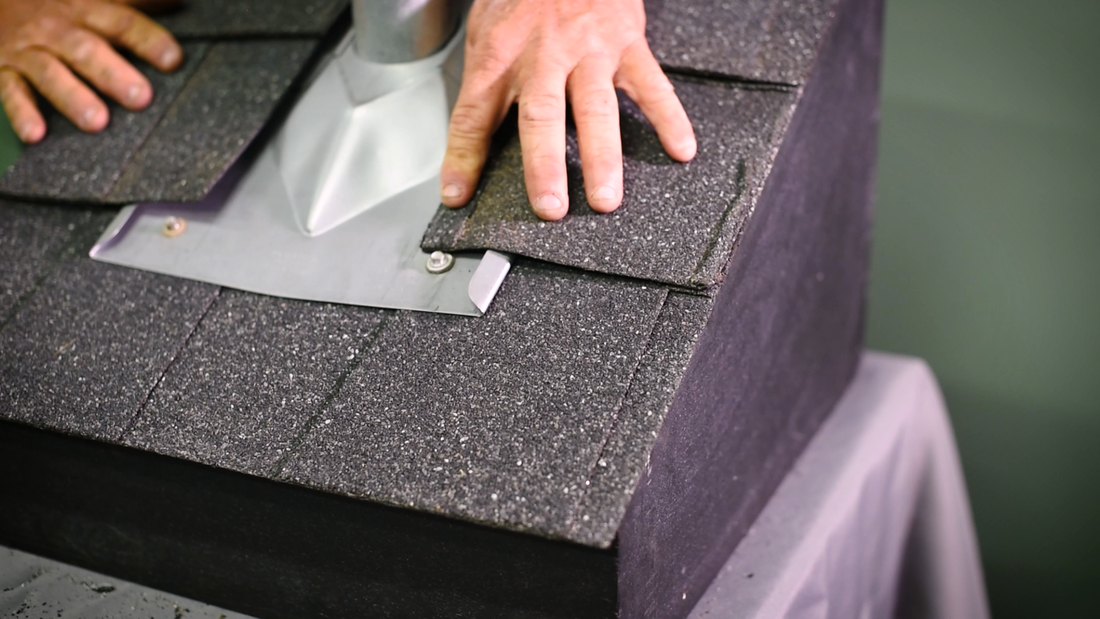
Secure flashing bottom to uneven roof surface, if necessary
If uneven roof surface prevents bottom edge of flashing from lying flat, secure bottom of flashing with wood screws using neoprene washers as shown here.
-
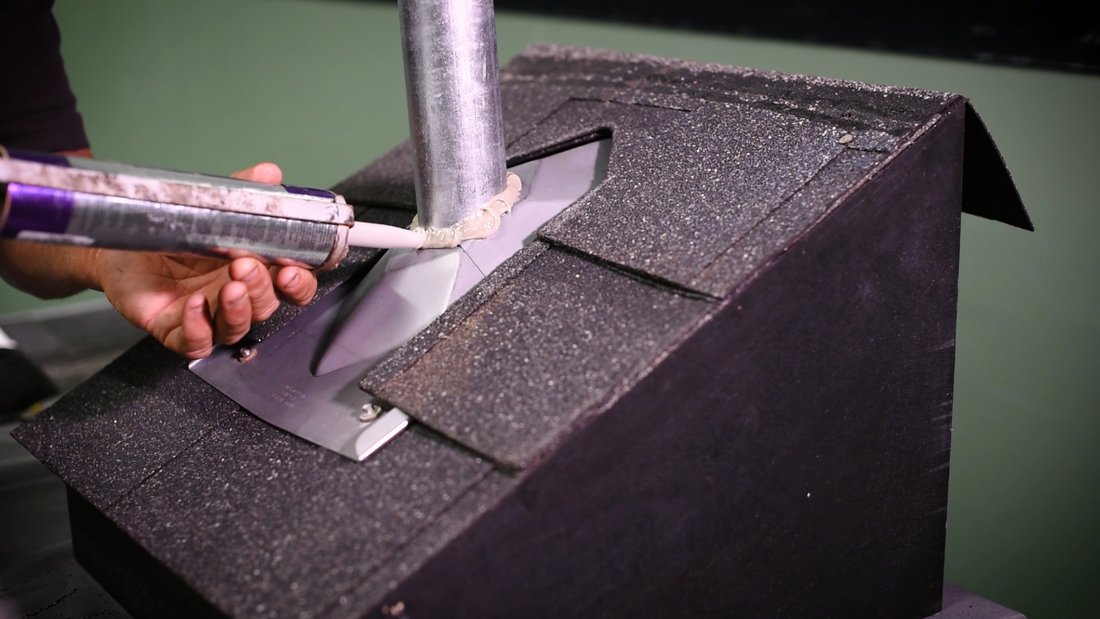
Seal with caulk
Apply a bead of urethane caulk around the electrical mast and the top of the flashing. Omega Flash must be caulked to prevent leakage.
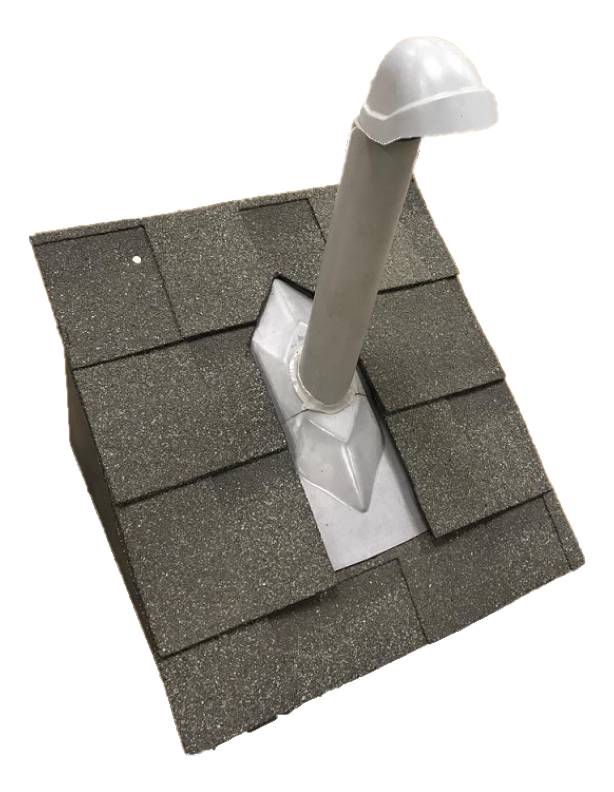
A properly installed Omega Flash